Headlight Issues

Issues
-
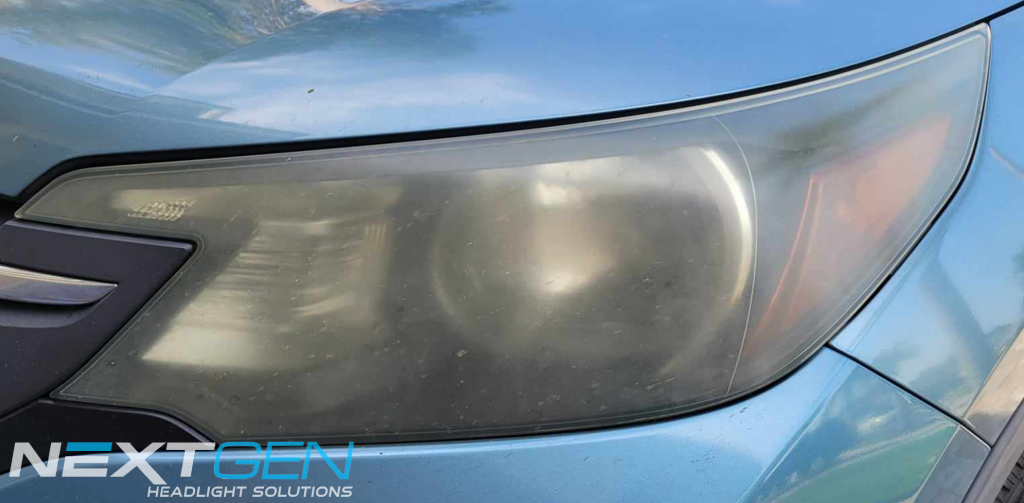
Basic Oxidation
Regular oxidation on the headlight is not only the most common issue, but also the easiest to restore. Since these headlights have a thin layer of oxidation, wetsanding to the bare headlight can take as little as 5 minutes per headlight depending on the size.
Starting Grit: 600 Ending Grit:600
-
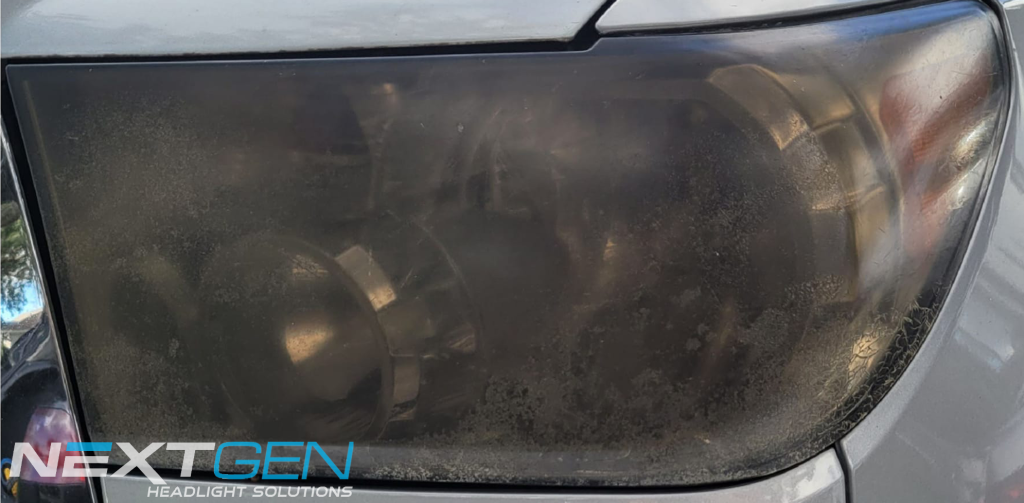
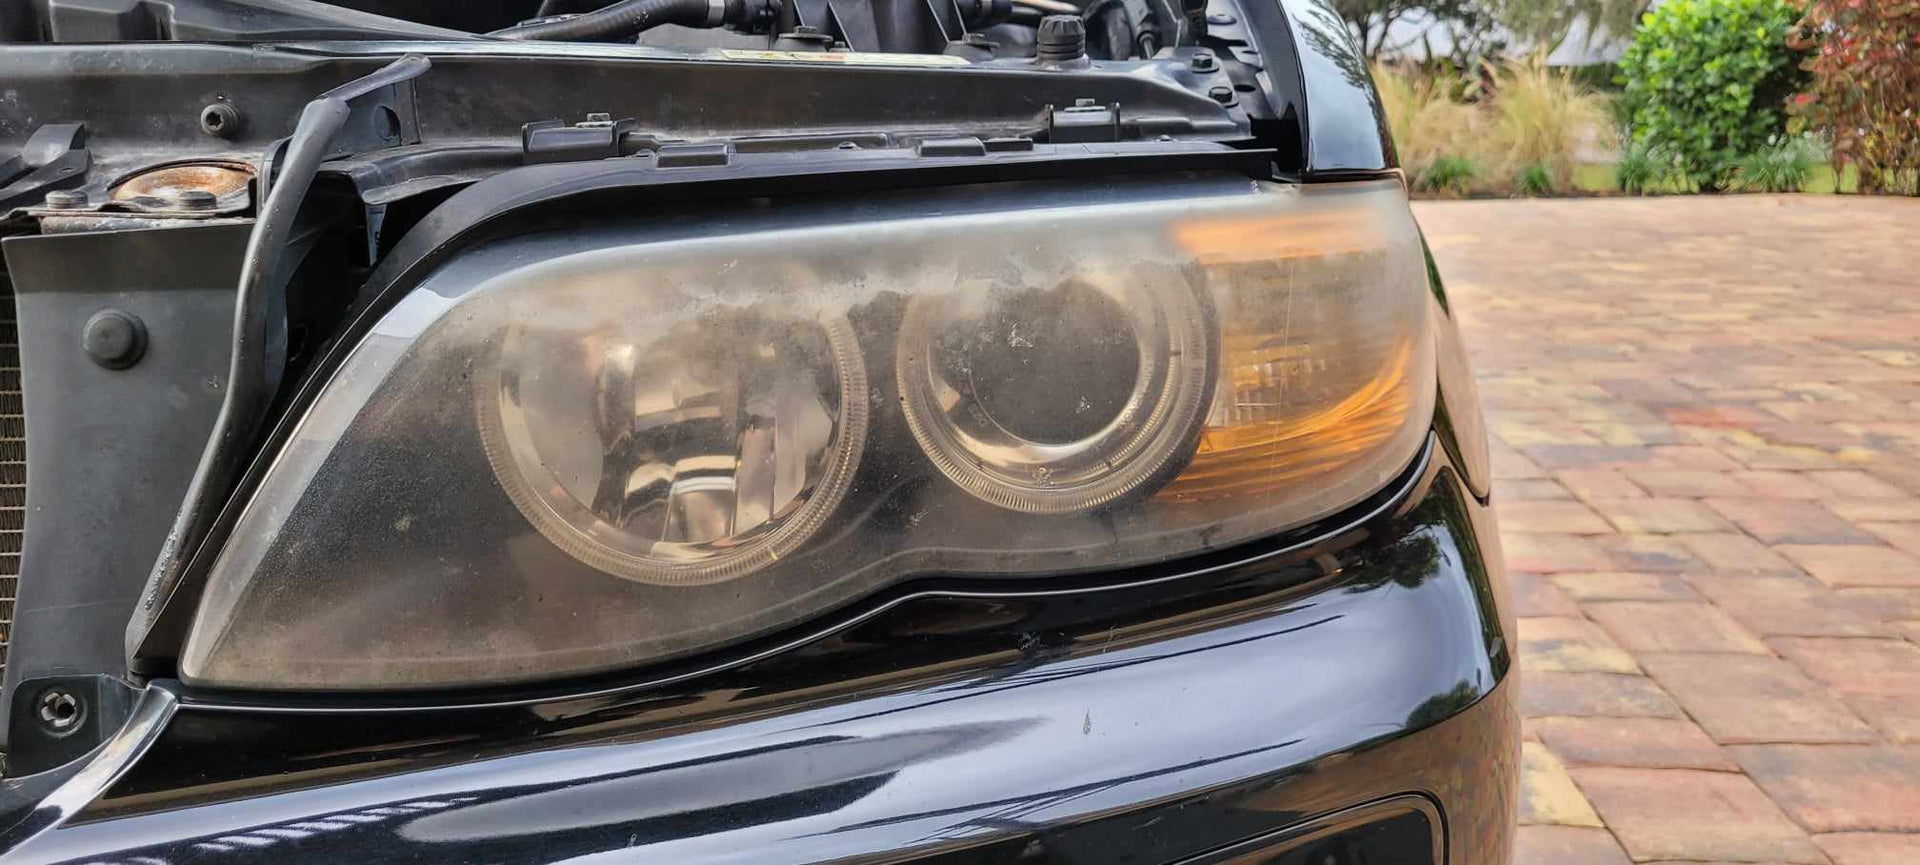
Severe Oxidation
Severe oxidation is like regular oxidation, only its penetrated deeper into into the headlight. These types of headlights can be a little more time consuming to get to the bare headlight, which is why in some cases its best to start with a 400 grit, or even a 320, then finish with the 600 grit.
Starting Grit: 320 Middle Grit: 400 Ending Grit: 600
-
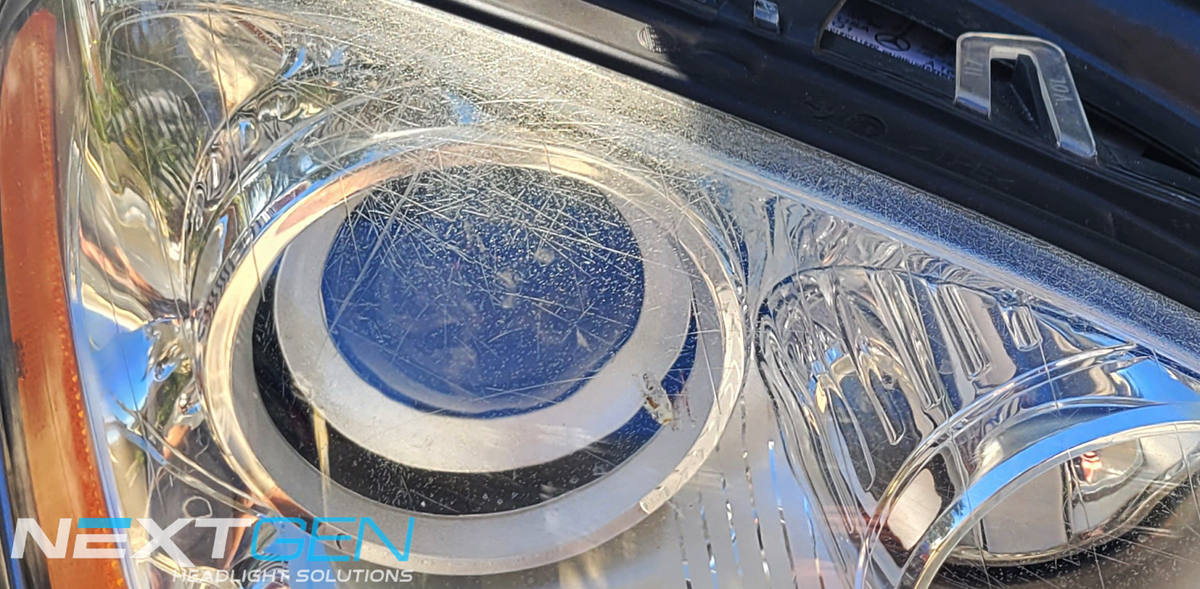
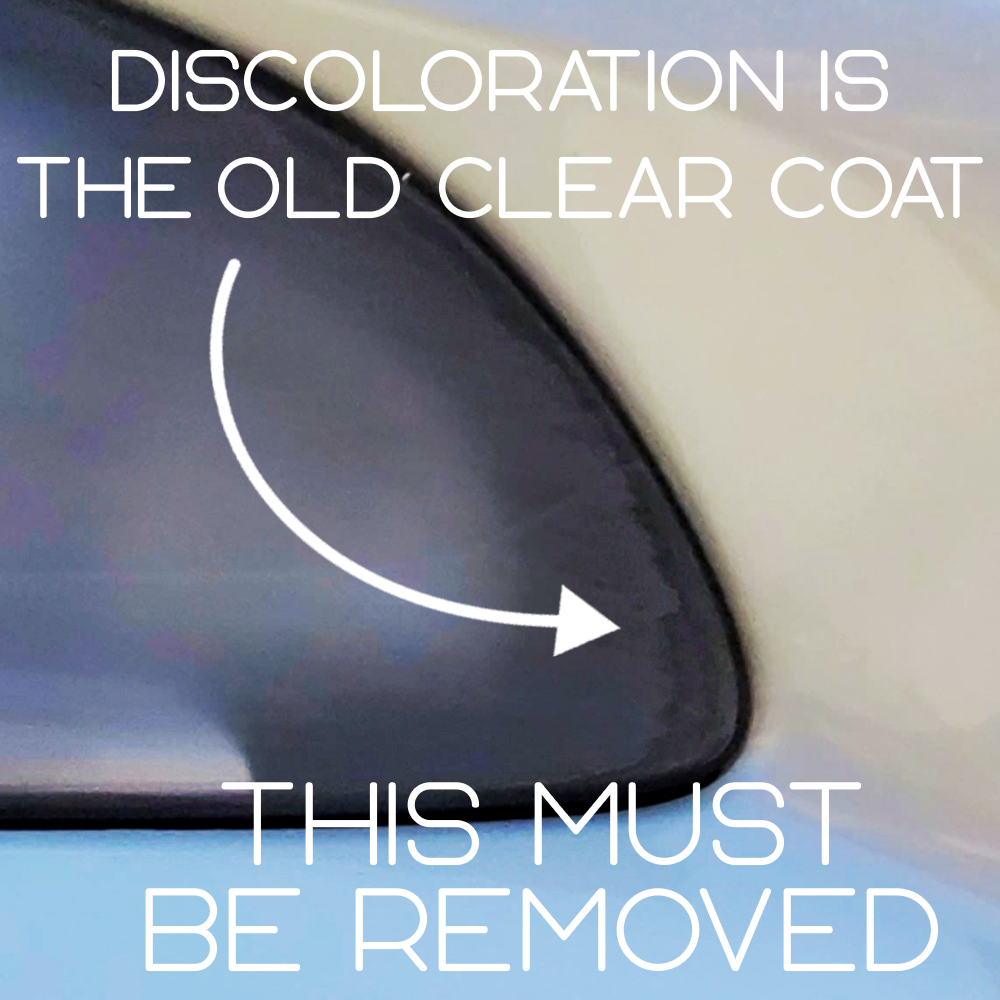
Intact Clear Coat
The most tedious and time consuming issue, is removing intact clear coat. In most cases, when a headlight begins to oxidize, its starts at the top, since thats where the majority of the UV rays from the sun hits. This means the top of the headlight can be oxidized, while the bottom half can still appear to be clear and in good condition. As stated above, you must remove the oxidationandfactory clear coat to get to the bare headlight to properly restore. Removing the old clear coat can be time consuming, but once your break into it, it becomes easier.
Starting Grit: 320 Middle Grit: 400 Ending Grit:600
-
Microcracking
Microcracking occurs when the Polycarbonate (The material the headlight is made out of) begins to form tiny cracks due to constant temperature changes. These cracks can either be on the suface, the middle pane of the lens, or close to the inside pane. While surface microcracks can be removed, cracks in the middle or deeper in the lens can’t. Oxidation on the headlight can still be restored and improve vision, but these little cracks may still be present.
Not Restorable
-
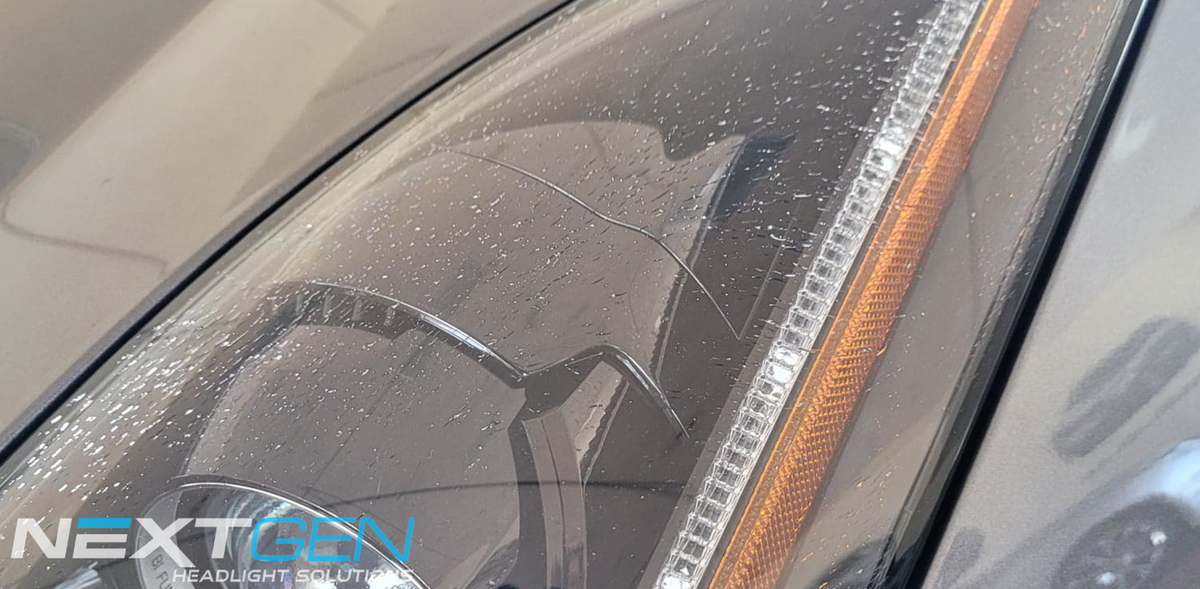
Scratches
Scratches in the headlight are fairly common. Its ok to assume that the very front portion of any vehicle is going to get some road debri or other things directly hitting the headlight. Scratches can come from a few different sources. From Car washes, to physically hitting something, and in some cases, results of factory clear coat beginning to deteriorate. Depending on how deep the scratches penetrate, they can still be removed by sanding.
Starting Grit: 400 Ending Grit:600


-
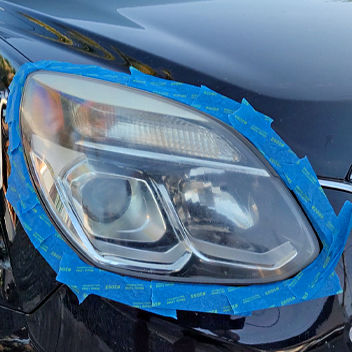
Step 1Mask off & Westsand the headlight
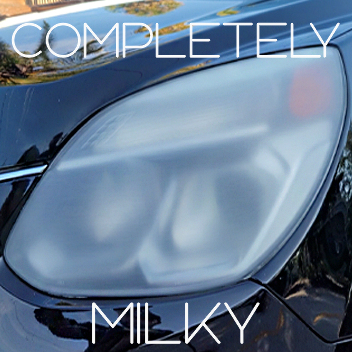
Start by Masking off the headlight to protect from any sanding accidents. Wetsanding the headlight in vertical or horizontal motions with medium pressure. Keep in mind,each headlight is different, therefore some can be more time consuming than others. Wetsand with the 600 grit sandpaper while spraying the headlight with water. This will carry away debris and keeps the sandpaper clean. It will also ensure a smoother and more even finish. Your goal here is to removeALLoxidation, old clear coat, andget to the bare headlight.A bare headlight will apear dull and milky. If you have headlights that are severely oxidized, you may need to use a more course sand paper.
-
Step 2 Dry, inspect & Clean the headlight
Thoroughly dry the headlight with the lint free towel, andinspectthe lens for any missed spots, or clear coat thats still on the lens. These spots will appear darker on the lens.If you do not remove all of this, it may be visible after applying the clear coat!The headlight lens should be completely dull, smooth andmilky. Remove your masking tape and reapply. This will remove any trapped water in the tape, and prevent any droplets hitting the wet lens after removal. Once it passes inspection, alcohol wipe the lens. This will remove any oils, or contaminents from the headlight.
-
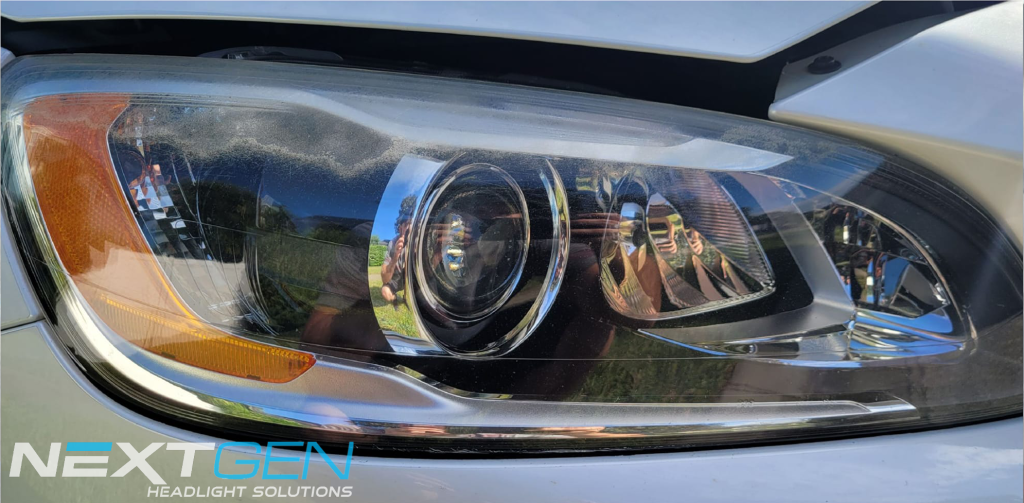
Step 3 Applying clear coat
Be sure the can is atroom temperature, andshake the can for atleast 2-3 minutes. This will build the pressure in the can, and mix the properties inside as well. Shaking the can will prevent the spray from sputtering when applying. Once you are ready to spray, do a test spurt to clear the nozzle, and prevent any spitting. Spray the clear coat4 inchesfrom the lens, holding the nozzle the whole time, stroking from one side of the headlight to the other. If the can is spurting, shake the can between strokes. Be sure to move with the contour of the lens. Inspect then lens once complete for any texturing. Touch up with clear coat on any missed spots. Flashoff or fogginess may be present immediatly after spraying. Allow headlight to dry and it will dissipate. To remove any overspray, immediately rub area with alcohol pad.


